So you want to learn how to make a swinger?
You will need PSP, Animation Shop & a Charm (see #2 below for charm)
I numbered these to help you keep your place.
Making a swinger is not as hard as it looks!
Ok Get your coffee or coke and lets get started!!
And remember undo is your friend if needed!
I only put a light shadow on the egg
Open PSP
1. In PSP:
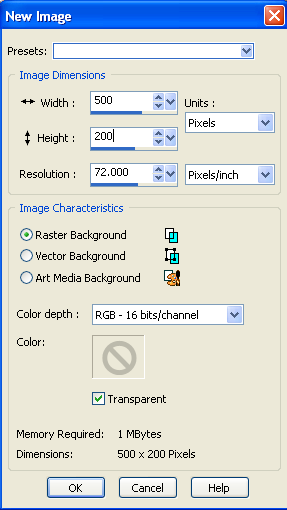
Click File - New > Open a new transparent image 500 X 200
2. Pick the charm you want to use, download to your computer so you can find it. Go here to get a Charm
3. Find & Open charm in PSP (so you can match the colors)
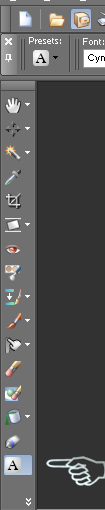
4. Click On the tools bar.
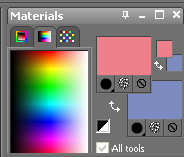
5. Then pick the color you want your name in. (I choose html #858fd1 & #ed808b to Match my charm)
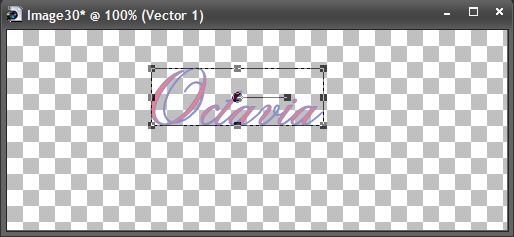
6. Pick a nice script font to loop your charm on. (I choose Cynthia Script ES)
7. Type your Name in the Font & Color you want!
(On the gray and white blocks, I try to keep the name around 3 blocks high.)
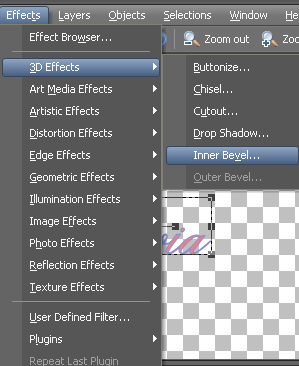
8. Go to Effect > Effects3D > Inner Bevel
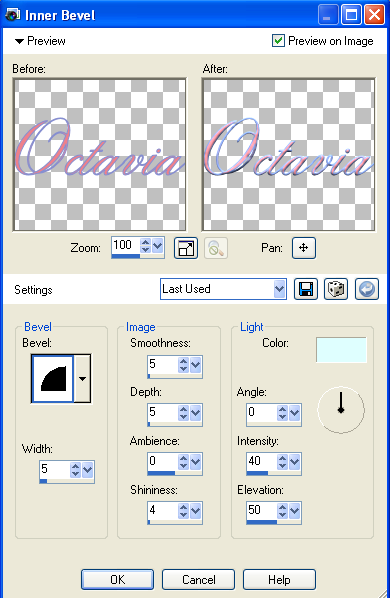
Setting: Here is what I used.
Bevel: Bevel 2 - Width 5.
Image: Smoothness 5 - Depth 5 - Ambience 0 - Shininess 4.
Light: Pale blue - Angle 0 - Intensity 40 - Elevation 50.
Play with the setting to your liking, then click OK.
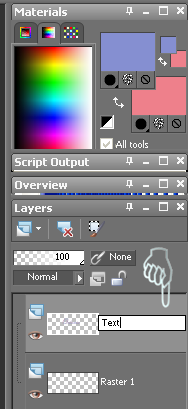
9. Rename Raster 2 to Text.
(On the right in the layer window, click on the word raster 2 and change it to read Test, click under the word text to make it take.)
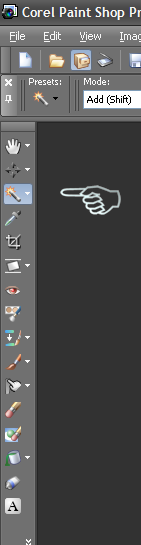
10. Click on the magic wand
11. Settings:
Mode: Add (Shift)
Match mode: RGB Value
Tolerance 0
Feather: 0
Use all layers and Contiguous has check marks in them.
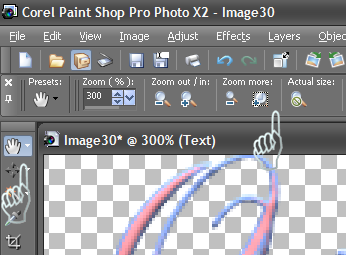
12. Click on image outside of name and inside of all loops, so you have marching ants around everything.
(You might need to click the hand on the tools and Zoom in to get to small areas, click Actual size to go back to normal.)
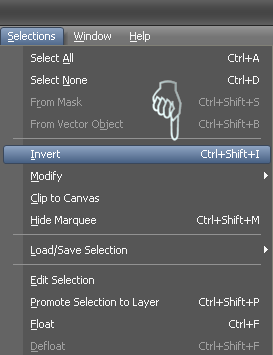
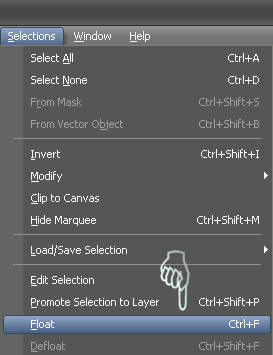
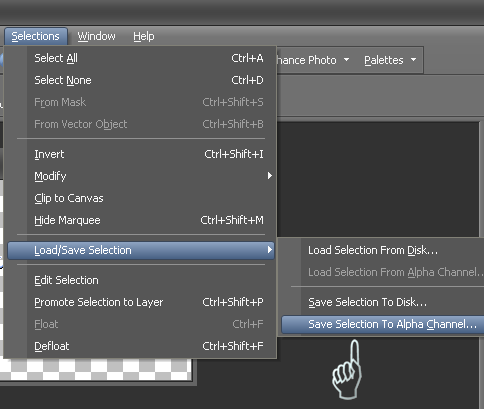
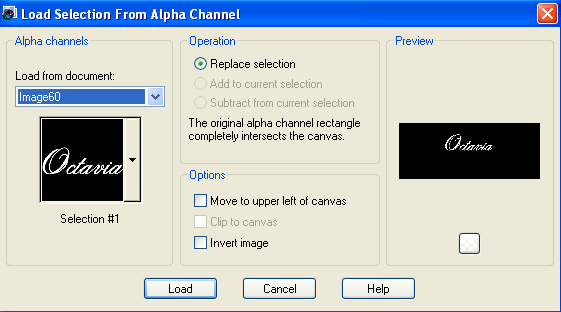
13. Click Selections > Invert
Click Selections > Float
Click Selections > Load/Save Selection > Save Selection to Alpha Channel
14. Click Save
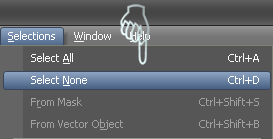
15. Once you have saved this text selection to your Alpha Channel you can select none in Selections
16. Now move to your charm - you might want to re-size it, if so do it now!
Apply the drop shadow to your liking, if you want any.
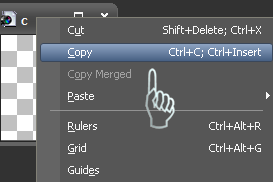
Right click on charm and copy
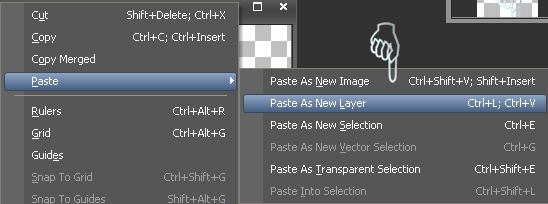
17. Right click at the TOP BAR of the Text Image > Paste > Paste as new layer.
18. Use your move tool to place charm 1 where you want it.
You may want to zoom in for this!
19. Name this layer Charm 1
20. Now back to your Charm!
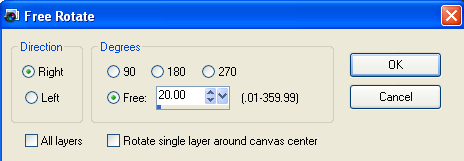
21. Click Image (at top) > Free Rotate
22. Right > Free 20.00 (Or your choice)
Click ok
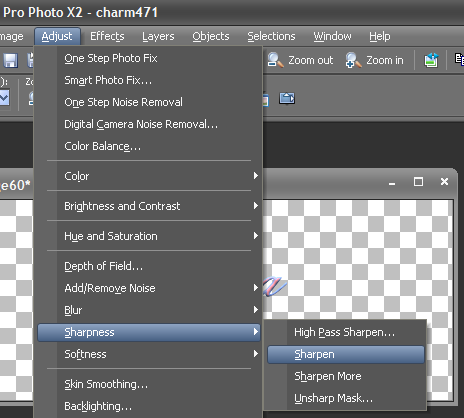
23. Your charm should of turned right!
If it blurred, go to Adjust > Sharpness > Sharpen
24. Right click on charm and copy >
Right click at the top of the Text Image > Paste > Paste as new layer.
Use your move tool to place charm 2 on top of charm 1.
You may want to zoom in for this!
25. Name this layer Charm 2
26. Now back to your Charm! Click undo until it is straight again!
27. Image > Free Rotate
Left > Free 20.00 (Or your choice)
Click ok
Your charm should of turned left!
If it blurred, go to Adjust > Sharpness > Sharpen
Right click on charm and copy >
Right click at the top of the Text Image > Paste > Paste as new layer.
Use your move tool to place charm 3 on top of charms 1 & 2.
28. Name this layer Charm 3
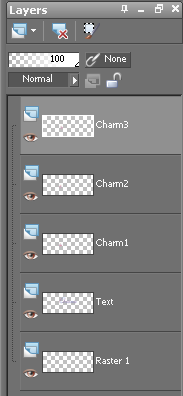
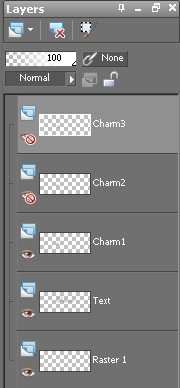
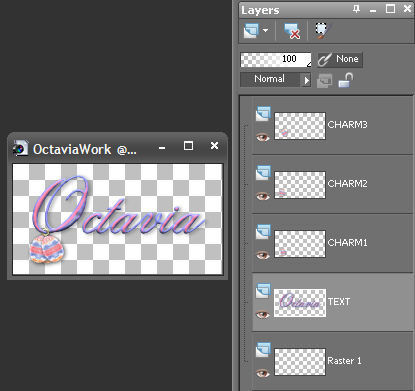
Your layers should look like this!
29. Make sure the charms are where you want them! If not move them now!
32. Click on the eye next to charm layers 2 & 3 to close them. (it will put a red X on them)
33. Highlight charm layer 1 to make it active.(on right in layers window, click on charm 1)
Notice how the color is lighter on a active layer!
You will need to zoom in.
Get your Eraser tool
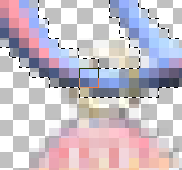
34. Erase the part of the charm loop that you have going behind the text.
Only erased that left loop part, because that is what would swing behind the text.
Stay inside the marching ants! (dotted lines)
35. When you are happy with your erasing, close charm 1 layer (click on the eye next to charm)
Highlight charm 2 layer to make it active and click eye to open it. (on right in layers window)
36. Get your Eraser tool and erase the part of the charm loop that you have going behind the text.
Only erased that left loop part, because that is what would swing behind the text.
37. When you are happy with your erasing, close charm 2 layer (click on the eye next to charm)
Highlight charm 3 layer to make it active and click eye to open it. (on right in layers window)
Get your Eraser tool and erase the part of the charm loop that you have going behind the text.
Only erased that left loop part, because that is what would swing behind the text.
38. Now all 3 charm loops that you have going behind the text have been erased.
38. Deselect the Alpha Channel > Selections > Select None.
40. You can now apply the same drop shadow to your text, if you used any on the charm.
Make sure that the text layer is Highlighted to add the drop shadow.
41. Make sure there are no red X's on the right and crop to your liking!
42. This is what it looks like at this point!
Now let's animate it! Open Animation Shop!
In PSP
43. Close charm 3 and charm 2 layers (click on the eye next to charm)
44. Charm 1
Highlight (Make Active) the Test Layer (Click on Text layer on right in layers window)
(No red X on Text layer or charm 1 layer)
Right click at the top of the Text Image > Copy Merged
Go to Animation Shop
Right Click > Paste as a New Animation
45. Charm 2
Back to PSP
Close charm 1 (click on the eye next to charm)
Open Charm 2 (No X on text or charm 2)
Right click at the top of the Text Image > Copy Merged
Back to Animation Shop
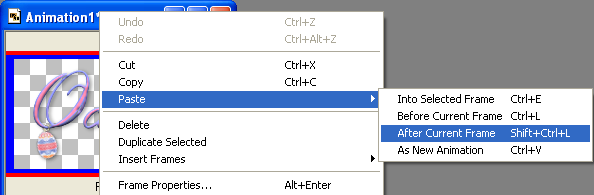
Right click at the top of the Image > Paste > After Current Frame
46. Charm 1
Back to PSP
Close charm 2 (click on the eye next to charm)
Open Charm 1 (No X on text or charm 1)
Right click at the top of the Text Image > Copy Merged
Back to Animation Shop
Right click at the top of the Image > Paste > After Current Frame
47. Charm 3
Back to PSP
Close charm 1 (click on the eye next to charm)
Open Charm 3 (No X on text or charm 3)
Right click at the top of the Text Image > Copy Merged
Back to Animation Shop
Right click at the top of the Image > Paste > After Current Frame
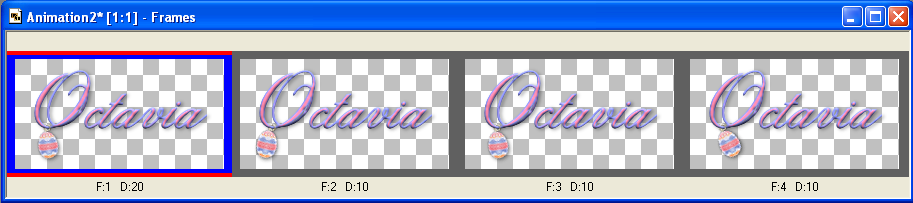
48. Click on frame 1 (Highlight Red & Blue)
49. Edit > Select All
50. Click Animation > Frame properties
51. Display Time > Set this at 20
Click ok! If you want it to swing slower, raise the number.
To View Animation click view animation, a separate window will open.
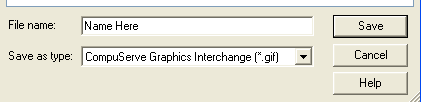
When you are happy with it Click Save!
Name you Image and in the SAVE AS TYPE make sure it says .gif
Then click SAVE
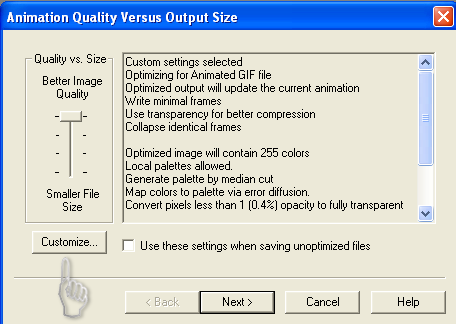
Then this window will pop up.
Click CUSTOMIZE
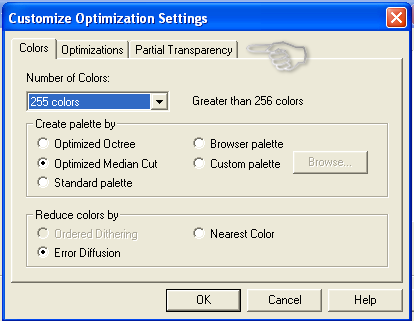
This window will pop up.
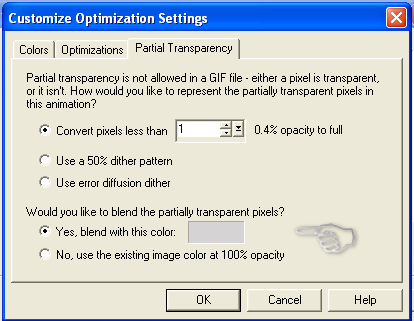
Click PARTIAL TRANSPARENCY
Click on the colored square and change the color to gray or white.
I think I used #DAD8D8 which is a light gray.
Click OK, then keep clicking next until you get to a button that says finish.
You made a swinger!!!!
Hope all went well and you are happy with the outcome!